
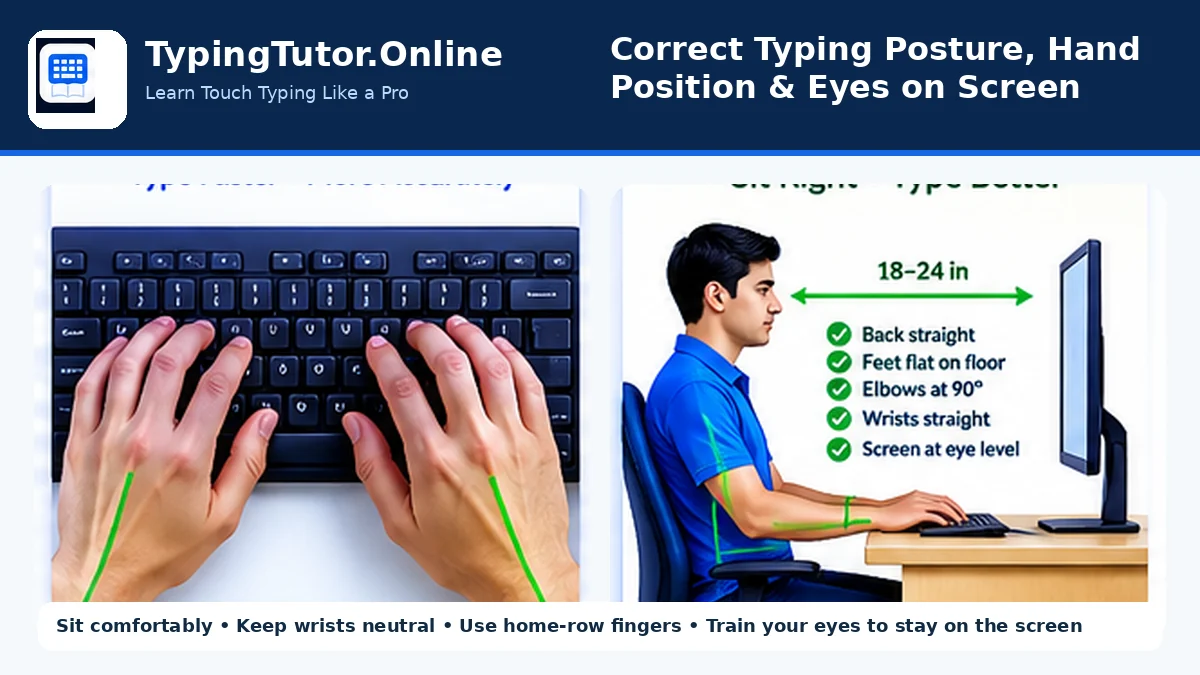
When someone asks me how to become a better typist, I do not start with speed. I start with how you sit, where you place your hands, and where you look. Those three habits decide whether practice becomes comfortable and repeatable or turns into a daily struggle.
My advice is to treat typing like any other practical skill: build the movement correctly first, then add speed. TypingTutor.Online follows the same general idea by introducing finger placement, home-row guidance, accuracy targets, and visual keyboard support before asking learners to move faster.
1. Start with a comfortable sitting position
Sit so that your back is supported and you can reach the keyboard without leaning forward. Keep both feet supported on the floor or on a stable footrest. Your shoulders should feel relaxed rather than lifted, and your elbows should stay close to your sides.
You do not need to force a perfectly rigid posture. The goal is a position you can maintain comfortably while still moving naturally. If you notice that your neck is bending toward the screen or your shoulders are creeping upward, adjust the chair, keyboard, or monitor rather than trying to “hold” an uncomfortable pose.
2. Keep the keyboard at an easy height
Your forearms should approach the keyboard naturally. Avoid bending your wrists sharply upward, downward, or sideways. A light, neutral wrist position makes it easier for the fingers to move independently.
Do not press the keys harder than necessary. Modern keyboards register a key with very little force, so a lighter touch can help you keep a steadier rhythm during longer practice sessions.
3. Put your fingers on the home row
For a standard English keyboard, place the left hand on A, S, D, F and the right hand on J, K, L, ;. Your index fingers rest on F and J. Most keyboards have small raised bumps on those two keys, which are useful because they let you find the home row by touch.
Use either thumb for the spacebar. Keep the fingers gently curved instead of stretching them flat. After a finger reaches for another key, return it toward its home-row position. This “return home” habit gives every finger a reliable starting point.
4. Why I recommend not looking at the keyboard
Looking down feels helpful at first because you can visually search for the next key. The problem is that it makes your eyes, brain, and hands depend on visual confirmation. Touch typing works differently: you want your fingers to learn the location of keys through repeated movement.
When you keep your eyes on the screen, you also notice mistakes sooner because you are watching the text you are producing. The raised marks on F and J help you re-center your hands without looking down. If you lose your position, pause for a moment, feel for F and J, reset your fingers, and continue.
5. What to do when you keep looking down
- Slow down until you can type the current exercise accurately.
- Practice only a few new keys at a time.
- Use an on-screen keyboard or finger guide instead of looking at the physical keyboard.
- Cover your hands lightly with a cloth or use a keyboard cover only if it does not interfere with safe, comfortable typing.
- Repeat short lessons rather than forcing a long session with poor technique.
6. Accuracy should come before speed
I would rather see a learner type slowly with correct fingers than chase a high WPM score while repeatedly looking down and correcting mistakes. Reliable speed appears after the correct movements become familiar.
TypingTutor.Online currently uses accuracy-focused lessons, progress feedback, an on-screen keyboard, and several hand-guidance styles. Use those aids while learning, then gradually rely on them less as your finger memory improves.
7. A simple 10–15 minute practice routine
- Spend one minute checking sitting position and hand placement.
- Practice the current lesson slowly for several minutes.
- Keep your eyes on the lesson text, not your hands.
- Repeat any key combinations that caused repeated errors.
- Finish with a short typing test only after the lesson work feels controlled.
My final advice
Do not judge your progress by speed alone. Comfortable posture, relaxed hands, correct finger placement, screen focus, and clean keystrokes are the foundation. Once those become automatic, speed becomes much easier to build.
Practice the technique first, then let speed follow. You can use TypingTutor.Online for guided lessons, visual hand placement, tests, and progress feedback.